Set Up Jamstack with No-Code (Publii)
I moved a 4-year-old company blog from WordPress to Jamstack and I want to share how you can do it without any code or scripts.
Jamstack sites are blazingly fast. If you have been frustrated with WordPress's bloat, slow load times, and constant plugin updates, Jamstack is a breath of fresh air.
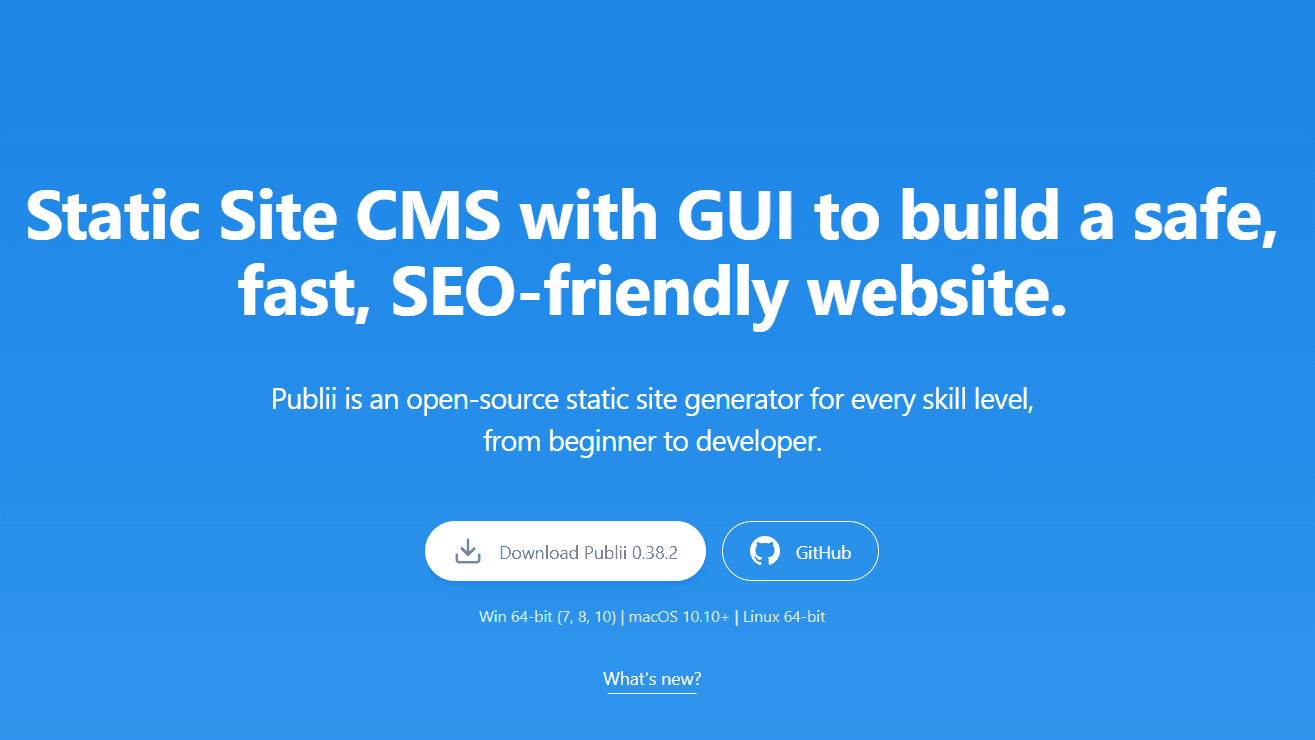
What is Publii?
Publii is a static site generator with a twist -- unlike most static-site generators that are code-heavy and unwieldy, Publii provides an easy-to-understand UI much like server-based CMSs such as WordPress or Joomla.
Users can create posts and other site content, and style their site using a variety of built-in themes and options. What makes Publii unique is that the app runs locally on your desktop rather than on the site's server. Available for both Windows and Mac, once the app has been installed you can create a site in minutes, even without internet access.
You get a block or markdown editor to create and edit posts -- no code required.
Step 1: Download and Install Publii
First, download and install Publii. It is cross-platform and available for Windows, Mac, and Linux.
The installation is straightforward. Once installed, you have a full CMS running locally on your machine.
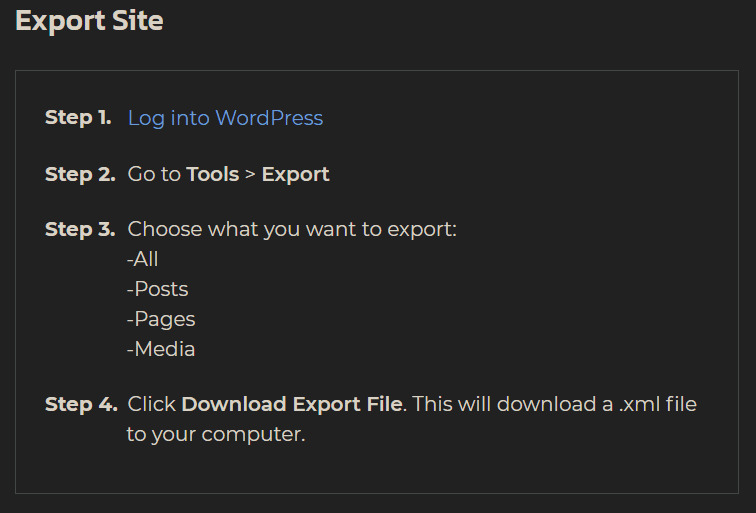
Step 2: Export Your WordPress Backup
Export the backup of your WordPress (or Ghost) site. WordPress has a built-in export tool that generates an XML file of all your posts, pages, and metadata.
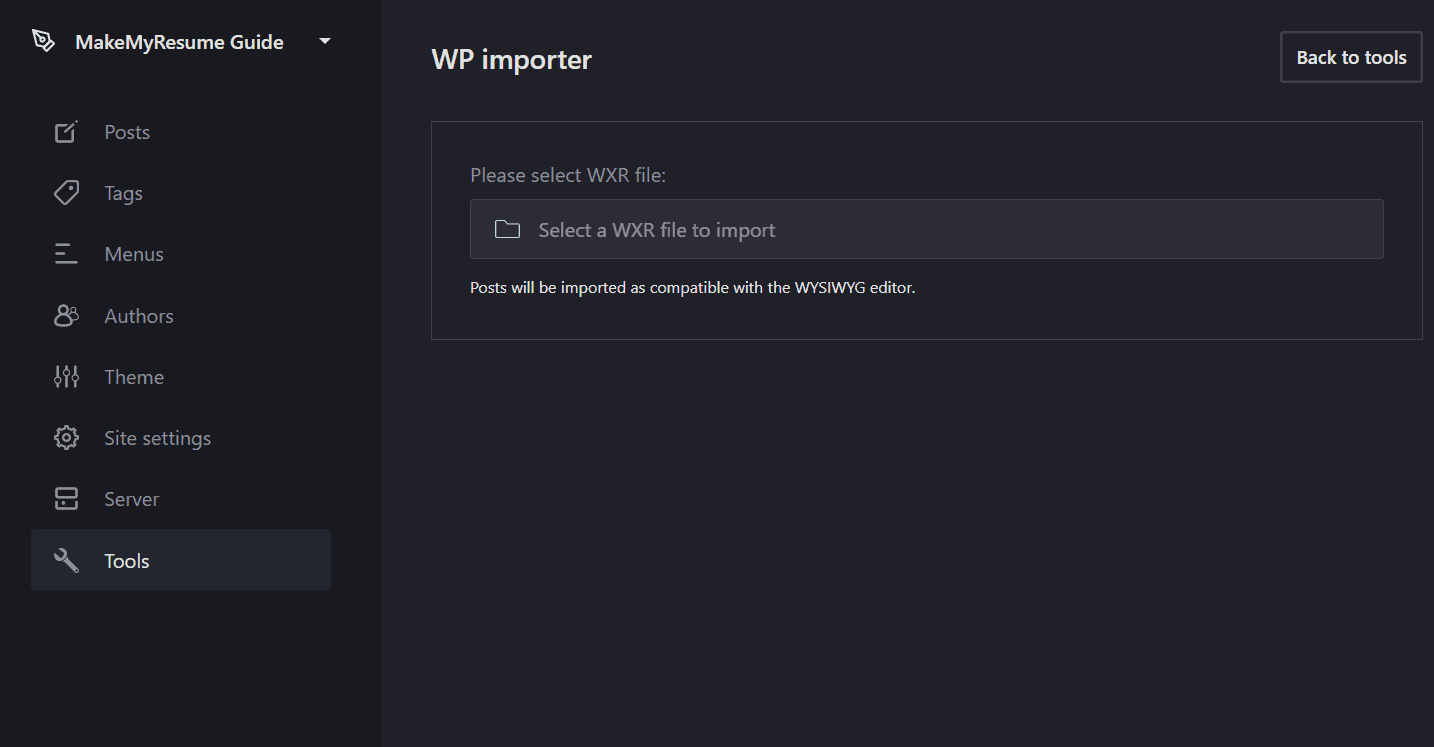
Step 3: Import into Publii
Import your WordPress posts into Publii. The importer handles most of the heavy lifting, converting your posts into Publii's format.
A Note on Tags
The only issue I faced was that tags were not ported properly and had to be done manually. If you have a lot of posts with many tags, set aside some time for this step. It is tedious but necessary.
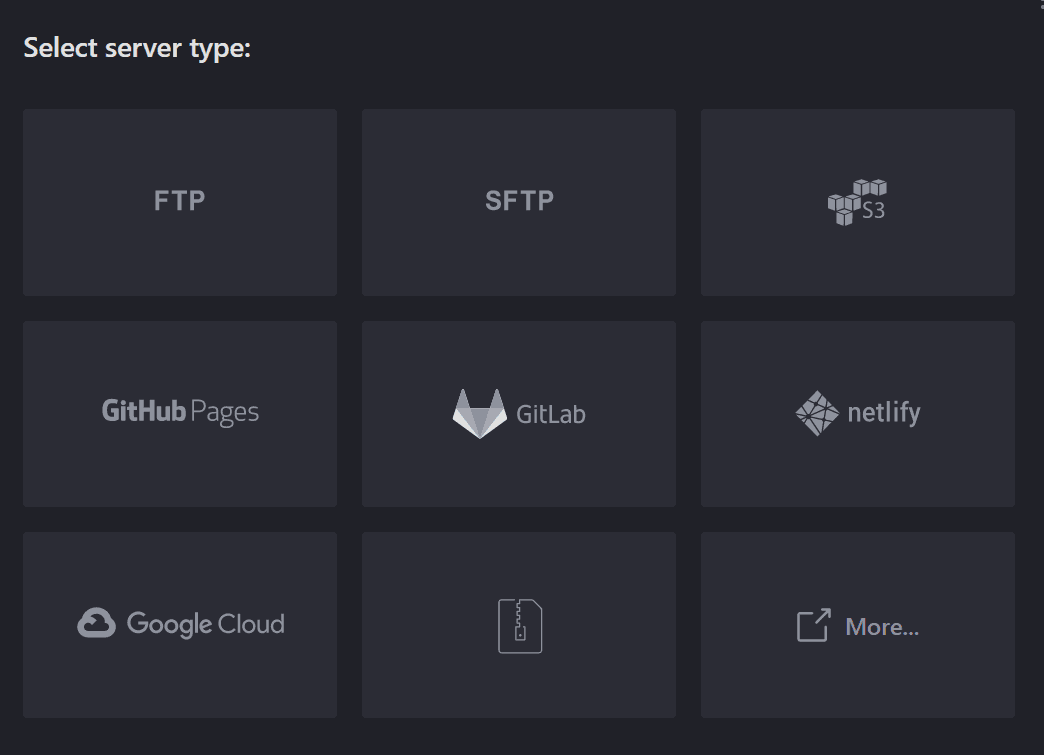
Step 4: Choose a Hosting Platform
Your hosting options are:
- GitHub Pages -- free hosting, great integration with Git.
- GitLab Pages -- the simplest option in my experience.
- Netlify -- excellent developer experience with continuous deployment.
- Google Cloud -- if you need more control and scalability.
I found GitLab to be the simplest option for getting started quickly.
Step 5: Set Up a Custom Domain
Once you have done all that, you can use Jamstack with a custom domain or subdomain. If you are using GitHub Pages, the setup involves configuring your DNS records to point to GitHub's servers and adding a CNAME file to your repository.

Why Make the Switch?
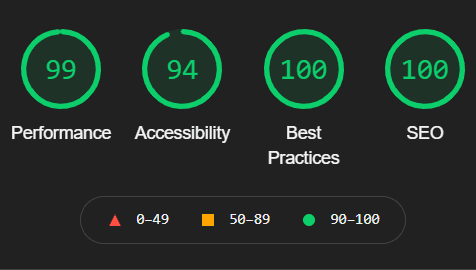
- Speed -- Jamstack sites load significantly faster than WordPress.
- Security -- No server-side processing means a much smaller attack surface.
- Cost -- Hosting static files is dirt cheap (often free).
- Simplicity -- No plugins to update, no databases to manage, no server maintenance.
- Developer experience -- Once set up, publishing is as simple as writing and clicking deploy.
If you are running a WordPress blog and have been curious about Jamstack, Publii is the easiest way to make the switch without writing a single line of code. The migration took me a few hours, and the performance improvement was immediate and noticeable.
Enjoyed this post?
I write a newsletter on product, AI, and startups called The Discourse with 5K+ subscribers. Deep dives, no fluff.
Subscribe to The Discourse →